Showing posts with label christmas. Show all posts
Showing posts with label christmas. Show all posts
Tuesday, January 3, 2012
Before explaining everything about it, and how to make it (for those interested on try it) I will warn you that I will be using lots of terms and ingredients many has not heard before, as many of these ingredients are widely used on Latin-American cuisine and nowhere else. Every ‘weird’ ingredient will have a reference to Wikipedia; in case I miss some of them, please leave a comment and I will edit the post.
 |
| If you search online for Hallaca you will probably find 100 different recipes, but all of them will look fairly similar. |
The Hallaca (if you are trying to imagine the sound it will be like ‘ah jacka’... although it seems that I pronounce it as ‘A jackass’... yes, I know you are giggling) is a traditional Christmas dish of the Venezuelan cuisine. There are different variations such as the ‘Pastel en hoja or Pie in Leaves’ of Dominican Republic, the ‘Pastelle’ of Trinidad and Tobago and the ‘Tamal’ of Peru and Colombia; all of them with similar taste but the Venezuelan is one of those with more refined flavours... And I am not saying this just because I am Venezuelan, just in case.
Its flavour (for those you who have not been fortunate enough to try it) is a mixture between polenta with beef stew with a hint of paprika, the sourness of olives, the saltiness of capers and sweetness of raisins; anyone who had it will have a hard time trying to describe its flavour. (Could you describe the blue colour to a blind guy?)
The Hallaca has a very interesting appearance as is stew filling bright yellow dough protected by layers of plantain leaves, and its intense fragrance combined with the smoked Plantain leaves will definitely overtake any other sense in your house.
A bit of history...
Its origins date to mid 1500s when Venezuela was a dependency of Spain and the big families had a huge number of slaves (Africans or Indigenous people) which were forced to eat the leftovers of their masters and given that Christmas is a very important holiday for Spaniards the leftovers were exceptionally good with plenty of pork, beef and chicken to be used by the slaves to cook their own dishes.
To most of the slaves a common meal was the cornmeal dough (a paste made out of corn and water) as it contains lots of nutrients and provides a considerable amount of energy; and as you probably guessed by now, they decided to mix with the leftovers to make some special Christmas dish served on Plantain leaves (the plantain and banana trees are extremely common in Venezuela).
 |
| Not many have tried the plantain. When cooked is sweet and extremely tasty (good source of proteins too). |
Apparently, several Indigenous tribes used the plantain and banana leaves as a natural way to preserve food by wrapping the food with it and then boil it; and as you might guessed as well, using this technique the slaves were sure its precious Christmas meals could last a very long time (taking advantage to the maximum the leftovers for later on).
Because the Hallaca takes a lot of effort (and numerous hours of work), it was served to friends and families only and with the release of the slaves, the Hallaca made it into the palate of wealthy families (as a way to say thanks to them) which then became a tradition, then a custom in the country.
Leaving history aside
Next I will try to explain the full process (the recipe is for 50ish portions, you could try to scale it down, but there is no warranty it will have the same outcome), as I have to do it from scratch because Australians don’t sell very easy some of these ingredients (such as the smoked Plantain leaves). The process is divided in stages: Ingredients, smoking leaves, making the consommé, making the stew, making the dough, putting it all together and cooking it (again).
 |
| Harina P.A.N, primary component of the Hallaca. Image from Adriana Lopez Blog |
- 3.5 Kg of Plantain or Banana leaves, plantain recommended as it is a bigger surface than the banana, but is not mandatory as the flavour remains unchanged.
- 2 Kg of Cornmeal (there is a product called ‘Harina PAN’ which is the best for this).
- 1 Kg of beef mince (preferable a grounded clean of fat cut).
- 1 Kg of beef for stew (is the one cut in squares, it has to be clean of fat; has to be chopped in squares no bigger than 1cm each).
- 1 Kg of pork leg meat (chopped in squares about 1cm long).
- ½ Kg of pork leg mince.
- 1 ½ Kg of Hen (you could change it for chicken).
- 500 grams of bacon (separate it in 400 grams and 100 grams as you will use it for different things, chop the 100 grams).
- 6 big onions finely chopped (I have no idea how much grams that will be).
- 3 big onions cut in rings.
- 200 grams of capers (try it before use it as it might be extremely salty, in that case put it on a strainer and wash it with 2 litres of water that should take the excess of salt).
- 3 green capsicums (finely chopped).
- 2 red capsicums (cut in strips).
- 1 bunch of leek (chopped).
- 1 bunch of chives (chopped).
- 2 cloves of garlic.
- 1 bunch of parsley.
- 1 bunch of coriander.
- 500 grams of tomato (chopped in squares).
- 150 grams of butter.
- 900 grams of filled green olives (or deseeded olives).
- 350 grams of pickled vegetables or giardiniera. Blend it with half cup of water (without the vinegar or the salty water).
- 2 litres of cooking oil (I use canola, but you could use any type of oil with mild flavour) plus ¼ cup of oil.
- 500 grams of raisins.
- 1 ½ cup of red wine.
- 2 table spoons of chicken stook powder.
- 2 table spoons of mustard sauce.
- 5 table spoons of steak sauce.
- 4 table spoons of tomato paste.
- 1 table spoon of sweet chilli (if you could find something called Aji Dulce will be better).
- Bay leaves (you will need around 30 to 40 leaves).
- Salt.
- Pepper.
- And finally the difficult ingredient: Annatto (15 table spoons). If you don’t find it, change it for saffron imitation plus paprika powder. Saffron imitation has less kick than real saffron, but is cheaper and gives you good colouring. It has to be the bright orange.
- Optionally: 100 grams of chopped almonds.
Smoking leaves
The plantain and banana leaves are made predominantly of hard and coarse fibre with a strong and unpleasant flavour when is raw. In order to allow it to be malleable and remove some of the taste it has to be cooked by smoke or expose it directly to fire for short periods of time.
To cook the leaf you will need a barbie (BBQ) on mid to low fire with its grill, pre-warmed evenly.
Take each leaf and place it directly on the grill, notice how the colour of its fibres changes from bright green (or light green depending on which side is up) to a darker and intense olive colour. The Leaf should NEVER change to brown or black (it means you burned it). Make sure the entire leaf is cooked and the colour is consistent and even.
 |
| Notice her hand is moving against the fibre and it should be following along the fibre. |
Do not tear apart the leaf because you will need a big enough patch where to place everything later on and bigger patches will be easier to handle than small ones.
Repeat the process for each leaf.
Tip: While cooking the leaf, try to have a humid cloth at hand. The barbie will be hot and the leaf will release a bit of oil (will be hot as well), if you want (and you know you are not going to burn it) use the cloth to handle the leaf as you cook it.
Wash each leaf with soapy water once you have finish smoking it and dry it with a cloth. Be careful with the leaf, it will tore easily. Easy trick to clean it, wipe on the same direction of the fibres.
Making the consommé
Consommé is a very simple soup (my mom would have hit me in the head as I said that). To make it take a pot with 4 and half litres of water and leave it on fire until it boils. Once is boiling take chopped (into pieces) chicken and put it in the water with two table spoons of chicken stock powder (if you want to be a bit more fancy, you could make your own chicken stock), a pinch or two of salt. Let it cook for 15 to 20 minutes or until the chicken is white-ish inside yet soft to the touch.
Once the chicken is fully cooked, take it out of the consommé and shred its meat in long strips. Add to the hot consommé the coriander leaves (you don’t need to chop it). After some good 10 minutes the consommé will be ready to use, just filter it with a strainer to have a clear golden liquid (get at least 8 to 9 cups of consommé).
 |
| It might look like this. If you are hungry you could have a cup in the meanwhile. |
Tip: If you leave the chicken in the consommé after is done, it will overcook (turning it into chicken flavoured rubber). As soon as the consommé is finished and the chicken is cooked take it out and leave it in a plate.
Making the stew
The stew is the tasty bit of the Hallaca (like the filling of the meat pie, a good meat pie has a great stew, take your time and you will be rewarded). The stew should never be stirred by more than one person and should be the same person at all times; this is a rule and do not ask why?!
In a big enough stew pot (you will be mixing up almost everything here, try to get the side right) you will pour ¼ cup of cooking oil and set the fire to low; slowly melt the butter in the pot.
Once the butter is almost entirely melted, add the chopped onions and garlic. Stir gently until the onions releases its juice.
Then add the chopped green capsicum, leek and chives. Keep stirring for another 5 minutes.
After 5 minutes, the capsicum should be almost cooked. At this time you will be adding 100 grams of bacon, let it cook for a little bit to then add pork mince. Stir for 5 minutes, include the chopped pork and let it cook with the lid on for another two minutes.
Add the beef (chopped and mince) and the parsley (about a cup of chopped parsley), giving it a good stir for two minutes to mix it up. Add 2 cups of consommé, 1 cup of water, the mustard and steak sauce and the tomato paste. Put the lid on and let it cook for 30 minutes on mid fire, periodically checking and stirring to prevent the stew to burn.
 |
| Referential image of the stew, if you follow my recipe the end result will be more colourful and less chunky.. Image taken from http://blog.lolalobato.com |
Then the stew should start releasing all those beautiful smells, when you remove the lid you should get a not very strong bouquet of the beefy stew. Time to add the capers, 300 grams of olives (sliced in rings), bay leaves, wine and the paste of giardiniera (pickled vegetables). Again, stir it to mix in everything, put the lid on and let it cook for 10 minutes.
Add the chopped tomatoes; stir a bit more (if you decided to add almonds, this is the right moment to add it). At this point you probably have a beefy stew which you could start adjusting the salt and pepper to then let it reduce at low fire. DO NOT PUT BACK THE SPOON IF IT TOUCHED YOUR MOUTH (again, you will have to believe me on this unless you want a very long explanation), the best way to try the stew will be to pour half spoon into a plate, let it cool and then try it. At this point the stew should be 30 to 45 minutes away to be ready. If you have plenty of liquids after that time, you could extract some of it using a clean cup (do not throw away this liquid as you are going to use it later on).
Tip: remember to stir every now and then to prevent burning the stew.
Making the dough
I am tired already and I am just typing the recipe...
As you might have guessed, while the stew is finishing up its cooking process, you could start preparing the dough!
But I will have to write a detour for some of you...
If you have annatto, you will have to heat up the amount of oil is described below, then to that hot oil you will add the annatto (7 or 8 table spoons for each litre).
If you don’t have annatto, don’t heat up the oil; just use it as is because later on we will add the paprika and saffron.
End of detour.
Pour 5 to 6 cups of consommé, two cups of oil, one cup of water and some of that delicious liquid you extracted from the stew (just liquid, if it has chucks remove the chucks before pouring the liquid) into a bowl.
With your hands, mix up all the liquids and start gradually adding the cornmeal; you must keep it consistent all the time, if you find lumps stop adding the cornmeal and massage the mixture to regain control of the homogenous mass (BUHUHAHAHAHA! you are creating Frankenstein monster!). The mixture must feel sticky without watery bits. If you feel is getting dry add more consommé (or water) and more oil (for each consommé cup you should add ¾ of a cup of oil). Add liquid as you need to, keeping the ratio water/oil, do not add the entire cup straight away since you will have to get to the right balance between sticky soft mass and dense paste (you don’t want to eat play dough).
Keep adding the cornmeal until you have added the two kilos (remember to keep adding liquids as you go). At the end add one table spoon of sugar (sweet and salty flavours always play nicely).
Tip: My mom used to use the right balance was ‘if you take a ball of it in your hand, turn it to face the dough. The ball should not leave your hands yet it has to be a little bit soft.’
Back on a detour.
If you added the annatto to the oil, at this moment your dough should be bright yellow. Don’t do anything else until the next step.
If you don’t have annatto, at this moment your dough should be light cream or whitish (although if you used the yellow cornmeal you might get a different yellow tone); so we are going to add two tea spoons of saffron (imitation, do not use the real saffron as you will expend a lot of money!) and 2 spoons of paprika powder and mix it up a bit more. The dough should be bright yellow now.
End of second detour.
Finally, we have to rectify the salt. Because we have a lot of dough we will have to start adding a full table spoon (of salt, obviously) to the mixture. Once is incorporated into the dough give it a taste, you should get a grainy texture of corn-something-like-chicken-and-another-weird-flavour-product-of-the-awesome-liquid-you-added kind of taste. If is a bit pleasant and you like the flavour then you are spot on. If not adjust a bit more the salt until you get it.
Tip: always start with little salt while you are adjusting. It will be extremely difficult to remove the salt once you have added it. If you like, try some of the dough before adding any salt; the dough will need some salt anyway because the cornmeal masks some of its flavour.
Putting it all together.
The moment to combine the dough, the stew and the plantain leaves has come.
Take one plantain leaf and spray a bit of oil on its centre (prevents the dough to stick to the leaf).
Make a ball of dough (about 8 centimetres in diameter) and place it in the middle.
With a chopping table wrapped in plastic cling, flatten the ball with the table until you get a pancake like shape. It must be close to three millimetres thin; thinner than that and it will be very difficult to get out of the leaves, thicker than that and you will be having a fat Hallaca with the filling on one side. The ball should be by now a 22 to 25 centimetres yellow dish on a plantain leaf.
Place one to one and half table spoon portions of stew in the middle of the pancake. Be aware you must try to leave as many beef stock (or the beefy liquid) out of the Hallaca as possible.
Decorate the stew in the middle with one onion ring, one or two olives, one red capsicum strip, 5 to 6 raisins, a bit of the chopped bacon and one chicken strip.
 |
| I am not going to be a critic of the image... but just take it as reference to put together all the components. Image taken from http://chubeza.com |
Now one tough part, wrapping it.
I am not going to write the full explanation of this process because it will be extremely difficult to explain without a visual representation, here is a video someone prepared earlier.
I do not use that technique because is a terrible waste of leaves and if you have cooked the plantain leaves as I told you before when you start folding the leave it won’t crack.
As you fold the Hallaca be aware of the fibre, fold it following the same lines made by the veins on the leaf. Then gently compact the content by pressing your hands on each side towards the middle and finish up ‘the present’. You will need some cord to tie it down so the next stage goes perfect.
Cooking it again.
You are now close to taste it!
Take a batch of hallacas (depends on the size of your steam cooker); lay down certain number of hallacas in your cooker and let it cook for 40 to 45 minutes, this will seal the dough and preserve everything in it.
Once done, let it rest for 10 minutes before cutting it open as the cooked dough is fragile after those 45 minutes. Don’t worry; it will get tougher after an hour or two.
The hallaca will not expire as fast as other type of meals because of its multiple layers of plantain leaves and the dense dough. But you will have to store it in the fridge if you want to eat it in the next couple of weeks or in the freezer if you are planning a longer term for its consumption.
Serving it is easy if you are careful; once the hallaca is hot, cut the cords and unfold the plantain leaves. Then eat the dough with its filling (do not eat the leaves).
If the hallaca is cold (most likely to be after refrigeration) heat it up using steam for 5 to 10 minutes or sprinkle some water on it and nuke it (whack it in the microwave for 2 minutes) then serve.
Easy peasy lemon squeezy!
Hope you like my mom’s recipe, enjoy it!
Cheers.
Wednesday, December 29, 2010
Have been a bit more than 5 days from Christmas Eve and Christmas Day... but I wanted to share with you how was my Christmas Eve.
Christmas in general is the celebration of renewal processes in the world... although Christmas is referred to the birth of Jesus Christ.
 |
| This year Santa was wondering if he really wanted to keep going around the world after he saw a nice weather down under |
I must say I am not a religious person... I find many abnormalities in Catholicism or Christianity plus I am bloke of science. I don’t want to start explaining myself... nor going to try explaining about planetary movements, day and night and why Christmas is best related to a periodic celestial event than to someone being born is that precise day.
Something that I found curious this Christmas was that I had more time to spend with Australians to share a bit of our traditions and understand how summer season (opposed to our cold winter) affects the celebration. It was interesting that Latin-American people celebrate the birth of Christ; which means we celebrate Christmas Eve and at midnight present exchange and family dinner, while Aussies (Saxons descendents really) celebrates ‘Christ has born’ day or Christmas Day.
 |
| We manage to draw a suspect detected in Sydney's north shore surfing with a bunch of animals... (no Rudolf seen on the scene) |
In any case, it will be translated into the inclusion of more traditions into our own... celebrating the birth on of baby Jesus... With Santa wearing shorts and riding a surfboard with his huge bag full of presents.
 |
| Screw you Rudolf!!! Here it comes roo-dolf! |
Edit: Thanks to Snap for sharing the Six White Boomers.
Turns out I am not the only one thinking Santa stayed here on Christmas Day.
How did I celebrate this year?
Well... Christmas Eve was nice. We spend the entire day cooking, cleaning and shopping; getting ready for dinner, to receive friends at our home.
Our Christmas table looked like this:
 |
| Yup... We had to take every single plate we had. |
 |
| Mixture of traditions... What do you think about it? |
 |
| Jack-o the Snowman was the vigilante in our table. |
 |
| Hopefully everyone enjoyed the evening |
Our Christmas dish looked like this:
 |
| Two slices of Christmas bread (turkey and ham) Chicken Salad (we couldn't find Hen... and lots of Aussies looked at us in disapproval when we asked) Roasted Pork And last, but not least... the Hallaca! (yes, that Yellow filled stuff thingy... it taste 10 times better than it looks) |
And I really don’t want to show our faces after such meal... but the good thing was baby Jesus came at midnight (Santa left him in our balcony to deliver the gift... you know... he is less bulky... and we needed someone agile to go in and out fast enough... I am not going to explain anymore) and the kids loved their presents.
Mine?
Well... I had a Tron: Evolution game (I love the Tron universe...), Kathy had an activity tracking system called My Personal Trainer for PS3... and we barely have touched it yet. But I guess one of the coolest was sharing the moment with such a good company.
 |
| Great game... Looks AWESOME in 3D |
 |
| Intense and great fitting programs... |
What was missing?
I missed my family lots... I wanted to have them all around, playing tricks on each other (common between us), hugging my dad and my mom. How knows... maybe next year?
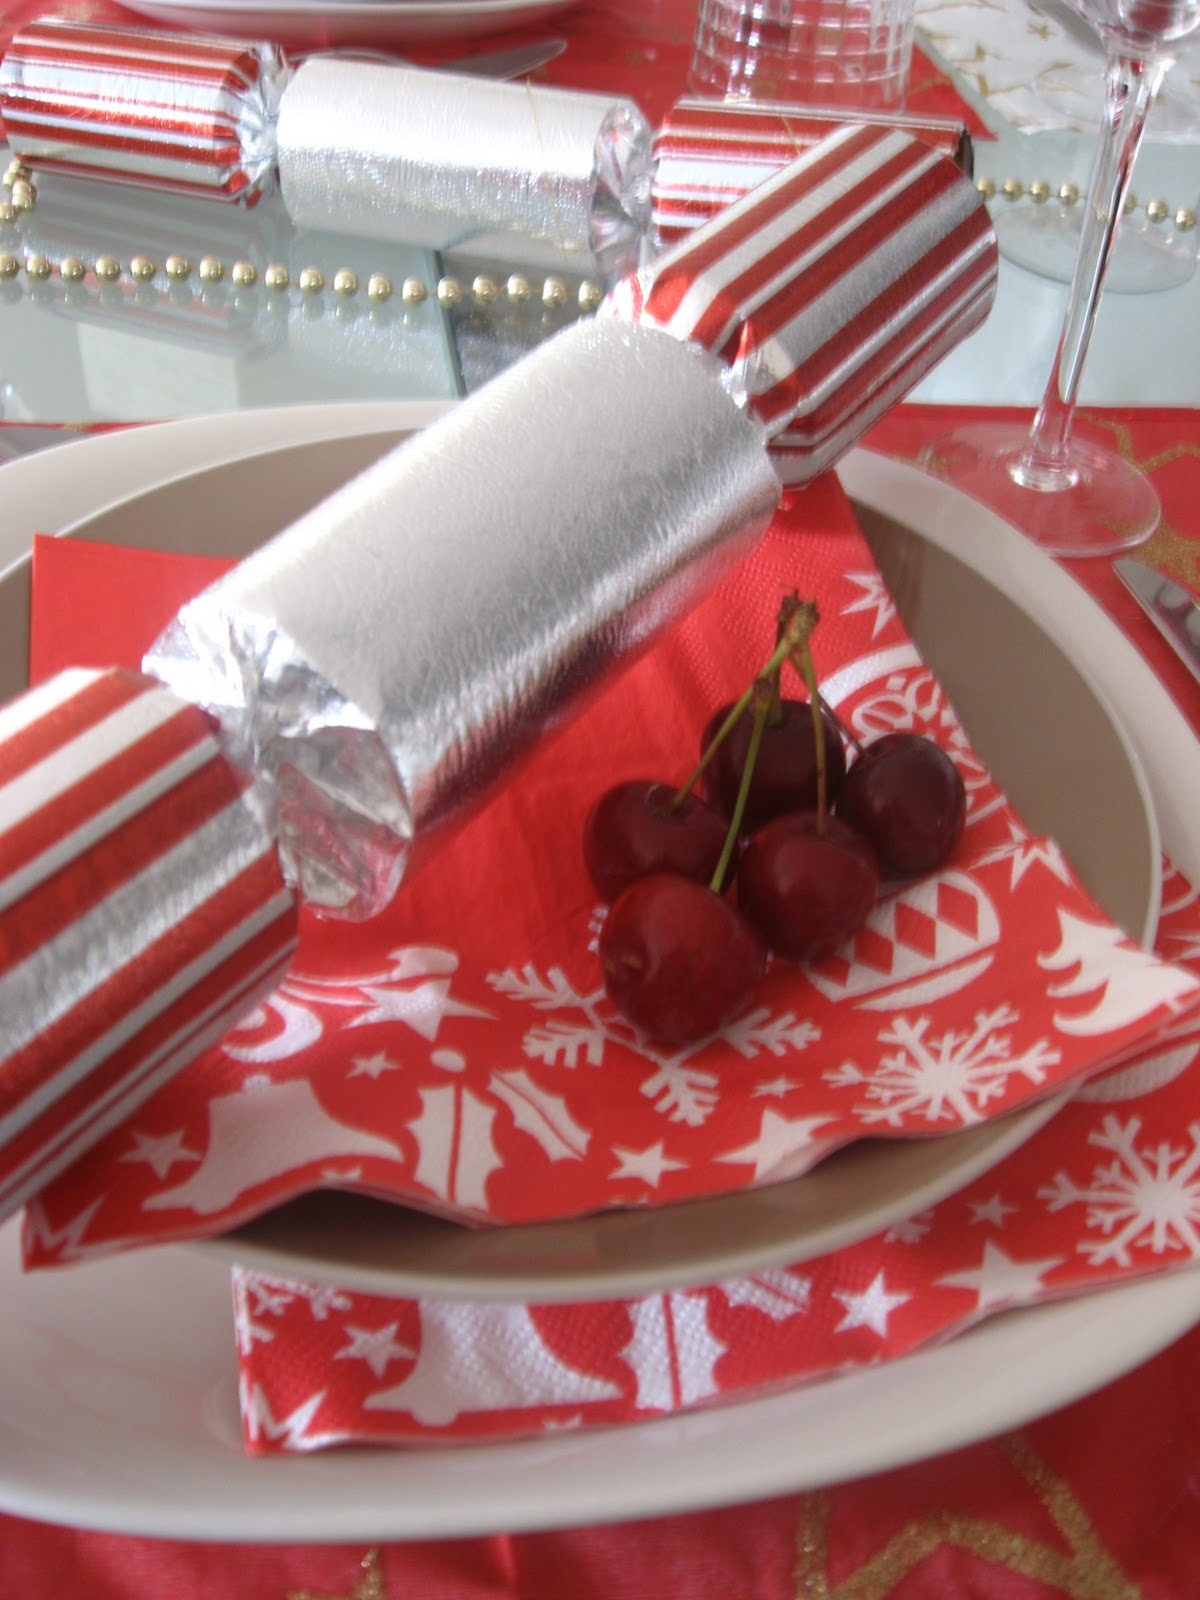
Now and before you ask... those wrapped things in our dishes that look candy alike are Christmas Crackers (Edit, also known as 'bon bons'... Again, thanks to Snap. I really appreciate your comments!). The Christmas cracker is a cardboard tube wrapped with pretty paper which contains a surprise gift and is tradition in the countries of the commonwealth.
 |
| One... Two... and... Three!!! |
The idea is to share a moment with someone around the table and pull it apart (like the chicken wishbone). Who gets the bigger part will have the gift inside.
If you want to know a bit more of the Christmas cracker, click here.
Sunday, December 26, 2010
Even though Venezuela is a really young country (and in many things immature nation), its people has come with very strong traditions when it comes to Christmas. Families come together, friends share a drink or two (or more) and acquaintances become mates... to celebrate baby Jesus birthday, upcoming presents and being in family.
But you might be asking to yourself... What the bloody hell relates the Christmas bread with Venezuela? What is that Christmas bread?
 |
| Did someone said something about Christmas and tasty bread? Image taken from BlastOButter |
A short explanation is: fermented bread containing ham, raisings or sultanas, olives and capers, cooked to perfection till is soft inside and out which is present in every Christmas disk in Venezuela... Does not matter if you are poor, worker, professional or rich; the Christmas bread or ham bread (just like the hallaca... pronounced as ‘Aajaakaa’) will make it into your plate with all its flavour and damned good carbs... ha ha ha.
You might say that I wanted to share this with my mates (Aussies and Venezuelans... and anyone) to keep my traditions but without coupling Aussie traditions into my own... But the way I see it is a bit different. We have come to this country to make it grow: economically, culturally, and gastronomically, but more importantly including good things in our new home. This is one of my gifts for this amazing country.
What do I need to cook Christmas bread?
 |
| Yup, at the end my first batch... getting fat as I took the picture. |
Ingredients:
- Yeast (3 tea spoons)
- Sugar (1 cup and 1 table spoon)
- Salt (1 tea spoon)
- Cooking oil (5 table spoon)
- Eggs (5 eggs plus another one to be used at the end)
- Milk (1 cup and a little bit... almost 1 and ¼ cup)
- Plain flour (1 kilogram and some other 200 grams for knead)
- Butter (100 grams, melted)
- Water (1 cup)
- Sliced smoked ham (250 to 300 grams per bread... If you are Jewish change it to turkey or chicken breast ham)
- Sliced bacon (200 grams... again if you want to remove the pork change it to turkey bacon)
- Raisins or sultanas (180 grams)
- Green olives without seeds (1 cup)
- Chopped capers (2 table spoons)
- Beers (six-pack... that’s for you... you need to be entertained while cooking...)
Tools:
- Measuring cup
- Measuring spoons
- Bowl big enough to mix up everything
- Rolling pin
- Trays
How to prepare the dough?
Take the cup of water and boil it up (I recommend two cups at this stage because the water might evaporate if you are not careful)... Standard warming process not microwaved!
When the water is hot, take one cup of water and mix it with one spoon of sugar in a bowl, then wait a little bit till the water is warm enough (keep reading the entire paragraph) to put in the yeast... How do you know when is warm enough? Easy, take your pinkie, put it in the water and count to 10 ‘Mississippi’. If you could count more than 10 then is too cold. If you could not hold it in up to ten it means that is too hot. So warm enough means hot yet not burning; keep this in mind... Yes is probable that you will get burn the first time... my advice is don’t put in the entire pinkie... just the tip.
Stir a little bit (four or five stirs is more than enough) and let it rest for 20 minutes with a piece of cloth covering the container.
After 20 minutes, take out the cloth (you will smell something that resembles beer... not your breath) and add the eggs (5 of them, lightly scrambled), sugar, salt, cooking oil, butter and knead it up till is homogenous (ish).
With everything mixed, start adding the flour in steps... handful at a time and keep kneading the entire mixture until you are done with the flour. Let it rest of one hour... again with the cloth.
This will give you enough dough for two big breads (2 kilograms), three standard size breads (about 1 kilo and 800 grams) or 4 short breads (about 1 kilo). If you want to make just one, save half of the dough in plastic wrap in the fridge up to one week. Don’t scale it down to ‘one portion’... the recipe is not scalable and you might compromise the flavour.
What we do is to prepare both breads at once and then give one of them as a gift to another family (if none is coming over to eat).
Note!The yeast is a living thing and need a warm place to keep growing... The cloth will prevent the mix from dropping its internal heat and will allow the yeast to breath. That adds flavour... don’t use plastic wrap or let it in a cold environment. Some people have told me an urban legend saying that yeast can’t receive sunshine... That’s not true... In fact, if the sun is strong and hot enough you might want to put your bowl outside to receive some sun till is ready.
One hour later...
You are ready to prepare the bread! Before to start, cut the dough in half (or as I specified before for different sizes) and save one portion in plastic wrap (or if you are going to cook it, leave it in the cloth).
First!
Take the dough and spreading a handful of flour on the table, knead the dough until is soft and malleable.
Second!
With the rolling pin flatten the dough and fold it on itself at least 3 times. Remember to add small quantities of flour every now and then, to avoid the dough sticking to the table; THIS IS IMPORTANT, you don’t want you bread to stick to the table because you will want to roll the dough on itself once all the ingredients are in place but don’t let the dough to suck too much flour, otherwise is going to get harder.
Third!
Using the rolling pin spread the dough as much as you can until you have something rectangular of two millimetres thick... Measurements aren’t important but it will give you an idea.
Note!Let's create a reference point. I have my rectangle in front of me, being long from left to right.
 |
| As I am describing it. |
Fourth!
Place uniformly each slice of ham on the dough, leaving 1 centimetre as border. Do the same with the bacon.
Note!If you want the bacon to be well spaced, chop it into little pieces and spread it.
Fifth!
Spread the raisins and the capers on top of the ham. Then put in the olives in rows on my most right (Remember note on third step... and should be 5 centimetres away from the border).
Sixth!
Roll the bread starting from my right (remember the note in third step) to my left. To close the end, dip your fingers in water and then apply it gently to the bread ends, sealing it.
With the exceeding bits of the dough (residues from the third step) you could do some decorations to your bread.
Take the bread and put it in a greased tray to be ready for cooking it.
How to cooking it?
The bread isn’t ready for oven at this stage... you will need to varnish with one scramble egg by brushing it to the surface of the bread. Check any spot because once in the oven the egg will turn into a nice gold colour. Then take at least 20 to 30 toothpicks and stick it deep into the bread; isn’t important to stick it all the way in, but try to put in as deep as possible to ensure each layer was touched by the toothpicks.
Note!The toothpicks aren't that important for the cooking process, but will allow cooking the bread completely while maintaining the shape (because it will try to expand a lot). The toothpicks will give you as well an indication of how well cooked the inside is... The picture shows the bread is well cook inside because it was no gooey bits.
With toothpicks and varnish in place, heat up the oven at 170 Celsius for 10 minutes with the bottom burner alone. Then slide the tray in for 45 minutes. Check after 30 minutes removing one (just one) toothpick (or poking the bread) checking if is gooey to then put it back. If you find no gooey bits is done.
 |
| As shown, is gooey... |
 |
| That's good! |
Understanding how your oven works is crucial; in my case my oven is a piece of junk... well, it works but I couldn’t cook my breads at 170 degrees unless I wanted charcoal as outcome, so as result I had to cook it at 120 for 45 minutes.
This bread should be moist inside, soft and dry outside.
 |
| Mmmmmmmmm... looks nice! |
Let me know how it was for you.
Thursday, December 25, 2008
 And another Christmas has come, and we are still here in Venezuela. Being honest this Christmas has been a little too sad for us, because we haven’t had enough feedback from the DIAC or from our migration agent (assessor) and this time should be more than 100% sure these are the last holidays (Christmas and New Year) we spend with our family in a long time (unless the department of immigration and citizenship has another surprise for us with those last-minute-migration-changes). At the moment, we try to very best to enjoy our old family members and the newest members as well (or even more).
Anyhow, we wish you the very best in this night and merry Christmas.
Cheers
Subscribe to:
Posts (Atom)


